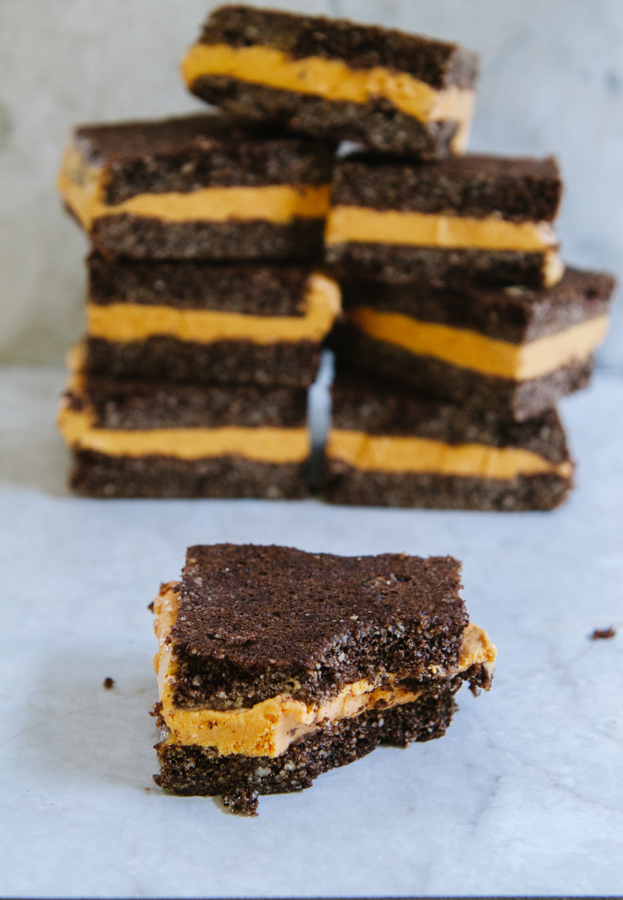
Chocolate Almond Cookie Pumpkin Ice Cream Sandwiches {Gluten-Free, Grain-Free}
Recipe adapted from Elana Amsterdam's Gluten-Free Almond Flour Cookbook
Ingredients
- 3 cups blanched almond flour ([aflink u="http://amzn.to/18D7Y2P"]this brand works great[/aflink])
- 1/2 tsp sea salt
- 1 tsp baking soda
- 1/2 cup arrowroot powder ([aflink u="http://amzn.to/1iuDnKr"]I used this one[/aflink])
- 1/4 cup unsweetened cocoa powder
- 1/2 cup of coconut oil, melted
- 3/4 cup maple syrup
- 1 tbs vanilla extract
- 1 pint pumpkin ice cream (or other ice cream of your choosing--anything will work!)
Instructions
- Preheat your oven to 350 degrees.
- Line your baking sheet with parchment paper and set aside.
- In a large mixing bowl combine your almond flour, baking soda, salt, arrowroot powder and cocoa powder. Whisk until it is well combined.
- In a separate bowl combine your melted coconut oil, maple syrup and vanilla extract. Whisk until it all comes together.
- Add your wet ingredients into your dry ingredients and mix together well with a spoon or baking spatula. Make sure you don't have any dry pockets.
- Spread your cookie batter out on the parchment paper. Try to form it into a rectangle. It doesn't have to be perfect, as you can square out your ends later, but try to aim for a rectangle shape. Make sure the batter is spread out evenly so that it will cook evenly. Using your spatula, or a clean set of hands, smooth out your batter.
- Bake for 10-15 minutes. They are done when the top of the cookie starts to look dry and begins to crack at the surface. Be careful not to overcook.
- Let the cookie cool on the baking sheet for up to an hour. You want to make sure that your cookie has completely cooled before you try to assemble your ice cream sandwiches.
- Once your cookie has cooled, remove your ice cream from the freezer and allow it to soften to a point where it is very spreadable.
- Using a sharp knife, cut your cookie vertically down the middle to create two even halves. Square up your ends.
- Scoop and spread your ice cream to cover one of your cookie halves. You are going to want a decently thick layer of ice cream. I would aim to have at least a 1/2 an inch thickness evenly spread out over the entire cookie.
- Once you have gotten your desired ice cream layer, carefully flip the other half of your cookie onto the ice cream layer, creating a sandwich. Gently press down with your hands to make sure that the top cookie is gently adhered to the ice cream.
- Place the ice cream sandwich as is in the freezer for several hours or up to overnight. You want to make sure that the ice cream has completely solidified again and is no longer melted.
- Once your ice cream has completely firmed up, you are ready to cut your ice cream sandwiches. With a sharp knife cut the big ice cream sandwich into tinier and more manageable ice cream sandwiches. I cut strips lengthwise and the cut squares from those strips.
- Now, you are ready to enjoy! Try not to eat at least two. I dare you. ?