
Bone broth, y’all.
I know the concept isn’t a new one. Simmer bones with veggies and herbs in order to create a gloriously flavorful and rich liquid. People have been doing it for ages. Chefs make it daily. My grandparents never wasted anything. Chicken or turkey bones were always made into soup. Ox tails were turned into soup. You guys… I ate a lot of soup. But, even though I knew that I could make my own broth, I never did. I’d buy a box or a can, or a box of cans of chicken stock. Leftover bones were always thrown out. It wasn’t until I was in my late twenties (29 to be exact) and in the middle of a full blown health crisis that I started to make my own.
 After about twelve years of going from doctor to doctor with a laundry list of seemingly bizarre and unrelated symptoms, such as: debilitating anxiety, pelvic pain, sore joints, weight gain, dizziness, heart palpitations, and a CRAZY amount of gastrointestinal issues– just to name a few, I was finally given a diagnosis last year of Chronic Lyme Disease. If you’re interested, you can read a little more about my journey in THIS post. During those twelve years leading up to a diagnosis, I had changed my diet dramatically. I went gluten-free, which was a real game-changer for my health. I didn’t know how awful I felt on gluten, until I eliminated it from my diet. I eliminated processed foods and copious amounts of both sugar substitutes and refined sugar (goodbye diet soda habit! Shudder). I started consuming lots of fresh veggies, quality meats, less grains and focusing on real and sustainable food. Although my entire health didn’t miraculously change overnight, and it’s still a process, I feel that if I hadn’t changed my eating template, I would be in a much worse place now. I’m grateful that I made these changes, as I am trying to fight this disease and the complications that come with it, such as: hormone imbalance, thyroid imbalance, chronic inflammation and leaky gut.
Making broth, like the one I am going to show you how to make here, has been, and continues to be a big part of my healing journey, especially when it comes to my gut health. Since the immune system essentially lives in one’s gut, it’s important to heal it up, especially when you’re dealing with a chronic illness that could use your immune system’s full, fighting attention. Remember when I showed you how to make chicken broth? Well, we talked about the benefits of bone broth in that post too. I’m going to put on my captain’s hat, and courteously direct you over to that post for more information about the healing prowess of broth and leaky gut. If you’re as fascinated by gut healing as I am, I wholeheartedly recommend this amazingly comprehensive e-book The Gelatin Secret. Now… back to broth, eh?
 In order to keep myself in good broth, I go to my local organic farmer and pick up bags of assorted beef bones (as well as chicken feet and pig feet for extra gelatin in my broth). I highly recommend getting bones this way. That way, you know exactly where your bones are coming from, and, believe it or not, they are more cost effective this way. I’ve purchased a bag of bones from Whole Foods for upwards of fifteen bucks. I doubt you’ll find bones from your farmer anywhere near that pricey. Just a lil’ insider tip from me to you…
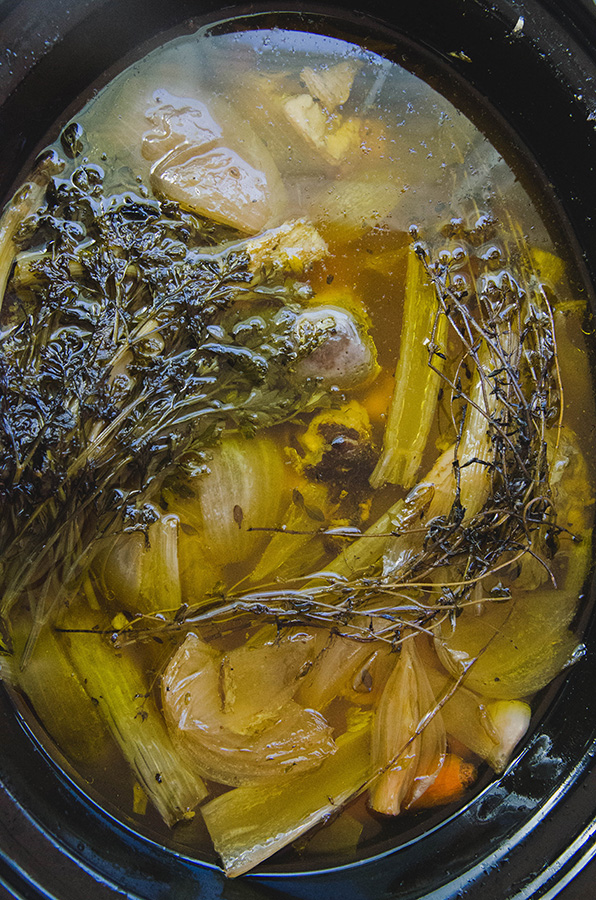
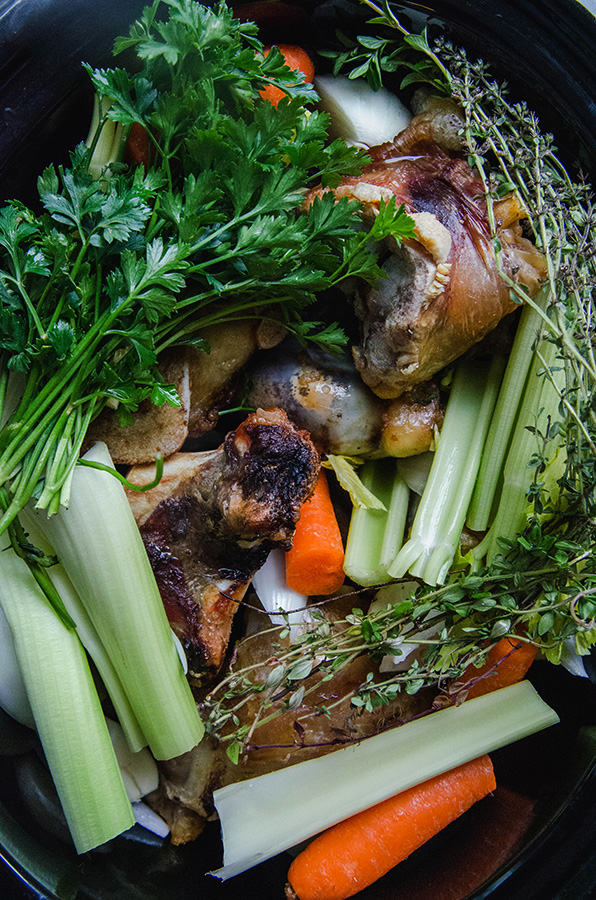
You don’t have to roast the bones in order to make a successful broth, but it’s something I like to do in order to enhance and deepen the flavor, especially with my beef bones. After the roasting, you simply place your bones in either your slow cooker or your pressure cooker (this is the type of pressure cooker I use) and add in veggies, spices, apple cider vinegar and filtered water. Once it’s done, strain your broth into a container and allow it to get cold. Put the container into the refrigerator overnight. A fat layer is going to form on top of your broth. Oh! And, don’t toss your beef bones, especially after one use. You can use the same bones over and over until they become soft. I can usually make three really good batches of broth from one set of bones. Nifty, eh?
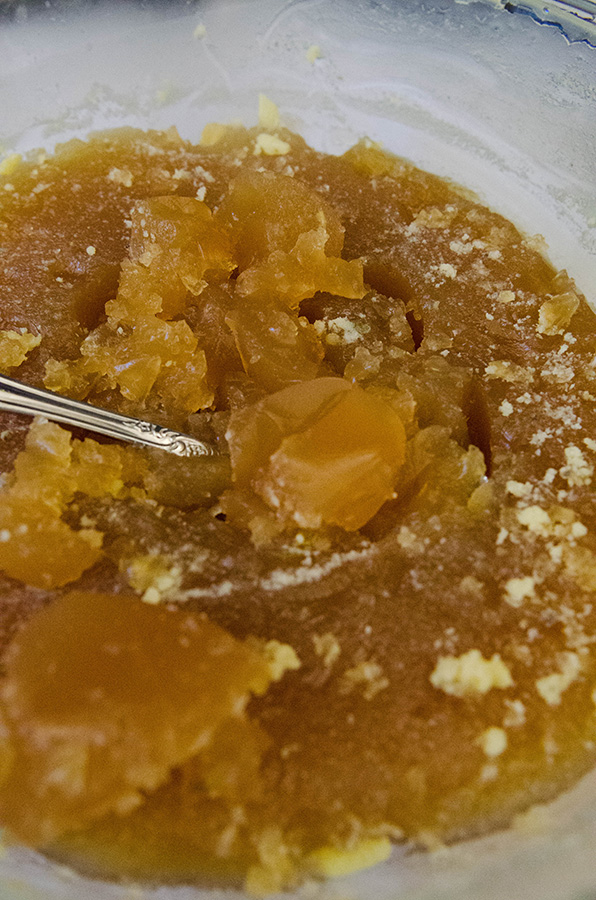
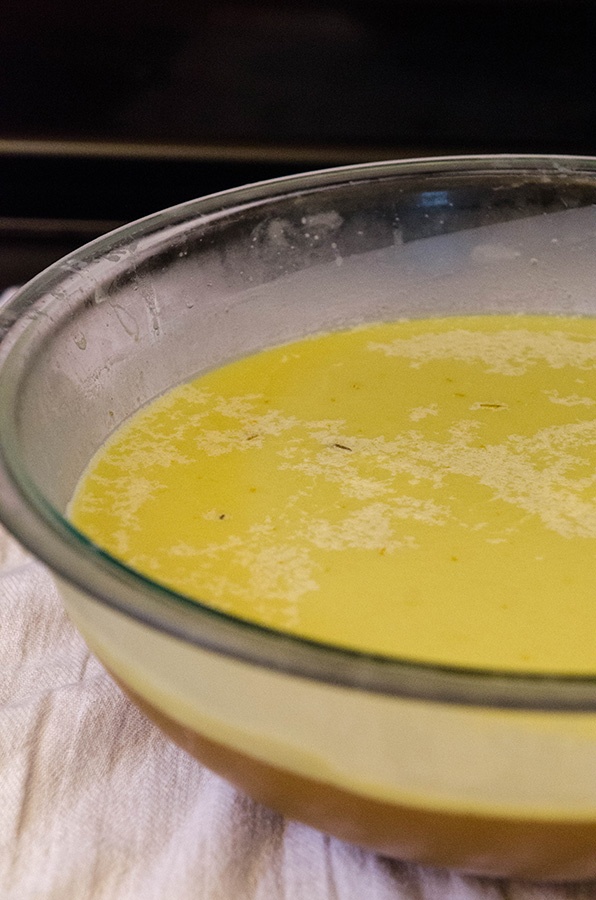 Here’s what the fat layer on your broth with look like. Simply scrape off the fat layer with a spoon to reveal the broth below. If your broth is full of gelatin, it will gel and look a lot like a meaty Jell-o. This is a great sign of a rich broth. If your broth doesn’t gel, don’t panic. It’s still full of nutrients! Use it up. Don’t get crazy. On your next batch, consider adding in some chicken feet or a pig’s foot with your bones. Both of those cuts are FULL of gelatin and will help your broth do it’s thang.
 See? Jiggle. Jiggle. I even took a video, so that you could see it in motion. Watch that broth twerk it out, as I spank it with a spoon. Ugh… that sounded way more 50 Shades of Broth than intended. Whoops.
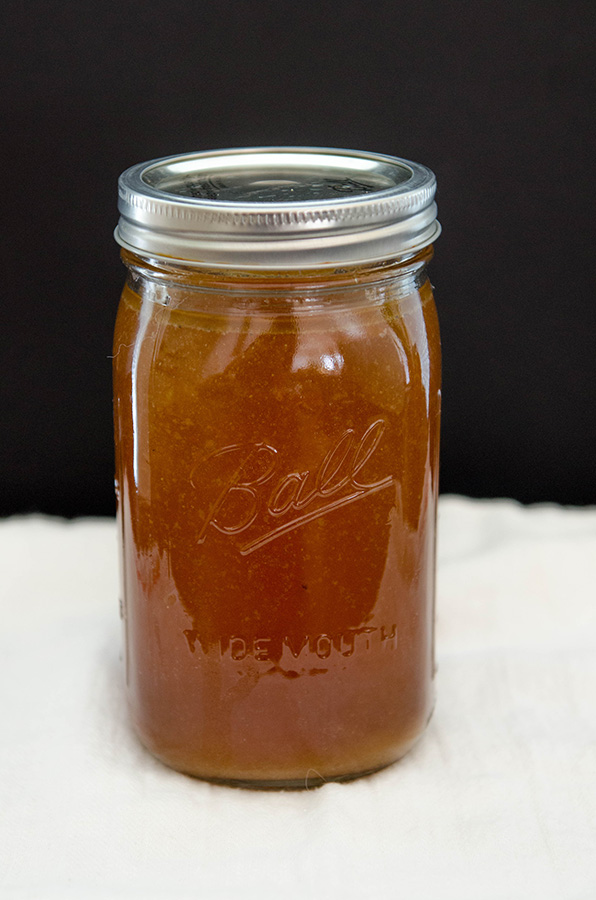
Now, you can reheat your broth on the stove and transfer it to jars or other storage containers. Freeze broth and use it later (I do this ALL THE TIME, and love to use these mason jars since they are freezer safe). The broth, without being frozen, will last about a week in your fridge.
Enjoy, friends! I hope this inspires you all to get yo’ broth on.
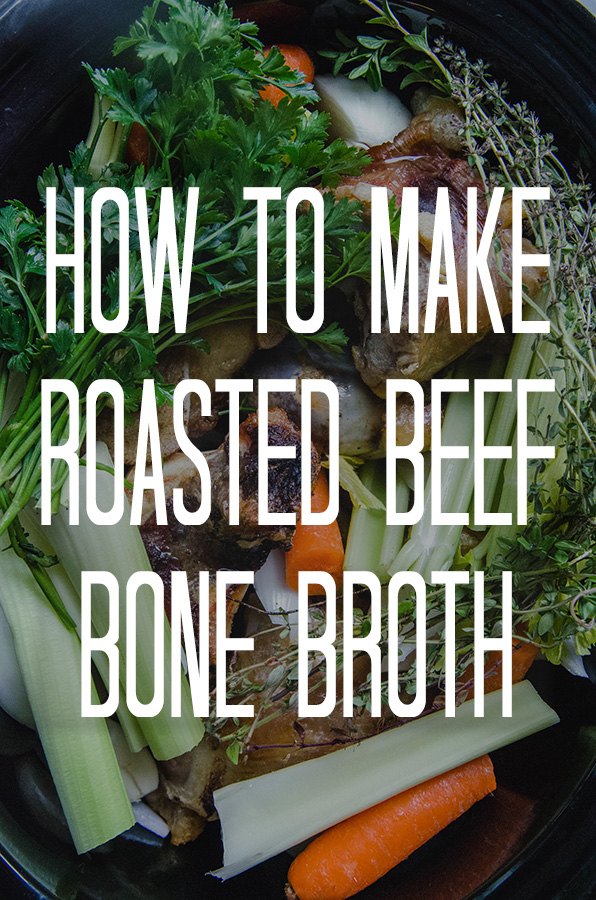
Roasted Beef Bone Broth {Slow Cooker + Pressure Cooker Instructions}
Note: there are endless combinations of veggies and spices that make great broths! Feel free to experiment. Here is a simple recipe to get you started. This is the recipe pictured in this tutorial.
Ingredients
- 3-5 lbs of grass-fed beef bones
- 1/4 cup apple cider vinegar
- 1 large onion, chopped
- 7 cloves or garlic, peeled and smashed
- 2 carrots, chopped
- 3 celery stalks, chopped
- 1 bunch of parsley, washed
- 5 sprigs of thyme
- 2 bay leaves
- Water, enough to fill your crock pot or pressure cooker over the bones.
Optional
- 5-10 chicken feet
- 1 pig's foot
Instructions
- Preheat your oven to 400 degrees.
- Line a baking sheet with aluminum foil or parchment paper. Lay out your bones on the lined baking sheet. Once the oven comes to temp, roast the bones for an hour, removing halfway through to flip.
- Add the bones to either the pot of your slow cooker or your pressure cooker, which ever you prefer. Pour the apple cider vinegar over the bones. Add your vegetables, spices, and water. If you are using a pressure cooker, be sure to be mindful of the fill line.
- If you're using a slow cooker, cook your broth on low for 8-24 hours. If you're using a pressure cooker, cook under high pressure for 2 hours.
- Once your broth is done cooking, strain out the vegetables and the bones until you are just left with liquid. Put this liquid into a container and allow it to cool. Once cooled, move it to the refrigerator and allow it to chill overnight. Don't throw away your beef bones. These can be reused until the bones turn soft. Simply put them in a freezer bag and freeze them until your next round of broth making.
- Remove from refrigerator after chilling. A fat layer will have formed on top. Scrape away the fat layer and discard. Below the fat layer you will be left with your finished broth. It might look like meat jello, or simply very thick. If your broth doesn't gel, that's OK. But, if you want it to, consider using either more bones, or adding in chicken feet or a pig's foot the next time around.
- Reheat your broth to a liquid state if it isn't already. Put into containers such as mason jars. Freeze them for later use, or use immediately. Your broth will last for about 7 days in the refrigerator.


I don’t think you’re ready for this jelly…..
Girl… you are the queen of bone broth. I bow down to you!
Also, I very much need a pressure cooker. That is all for now 😉
[…] only amazing, gluten-free food (as well as sharing my obsession with citrus) but still one of the funniest blogs I’ve […]
Im new to paleo so what do you use the broth for once you have made it???
Hey Tammy! Use it as you would any other beef broth or stock in recipes. If you’re trying to heal your gut, you can also just drink a nice warm cup of it. I like to add salt and lime, and it goes down easy.
When re-using the bones for a second or third batch…do you roast them again?
Nope. I simply roast them the first time. If you have no time to roast the bones at all, that’s fine too. But, I find that roasting them before the first batch of broth develops a deeper flavor.
I make this all the time. It tastes so good and when my daughter and her boyfriend were sick they both drank it. They both said it tastes oh so good and it really did help them feel better quicker.